Help Center
Hey there, need some help?
- Deep Enrich Extension
- Overview
- Installing the Extension
- Accessing Deep Enrich on a Prospect Profile
- Sign In to Your Deep Enrich Account
- Understanding the Deep Enrich Panel
- When Contact Details Are Found
- When Contact Details Are Not Found Immediately
- Credit
- Assign Credit
- Bulk Enrichment
- Overview
- Uploading Your CSV File
- Configure Your Enrichment Settings
- Tracking Your Enrichment Progress
- Understanding Enrichment Statuses
- Downloading Enriched Results
- Team Collaboration
- Campaign Dashboard
- Introduction to the Campaign Feature
- Contact Export
- Overview
- Accessing and Exporting Contact Export
- Contact Access Permissions
- Filter Your Contacts Before Exporting
- Exported Data
- Create Group
- To add members
- Manage Group (Manager)
- Agent Dashboard
- Dashboard
- Overview
- Search Prospects Instantly
- AI Search Prompts
- Credit Usage
- Recent Searches
- Dashboard
- DeepEnrich Campaign
- DeepEnrich Extension
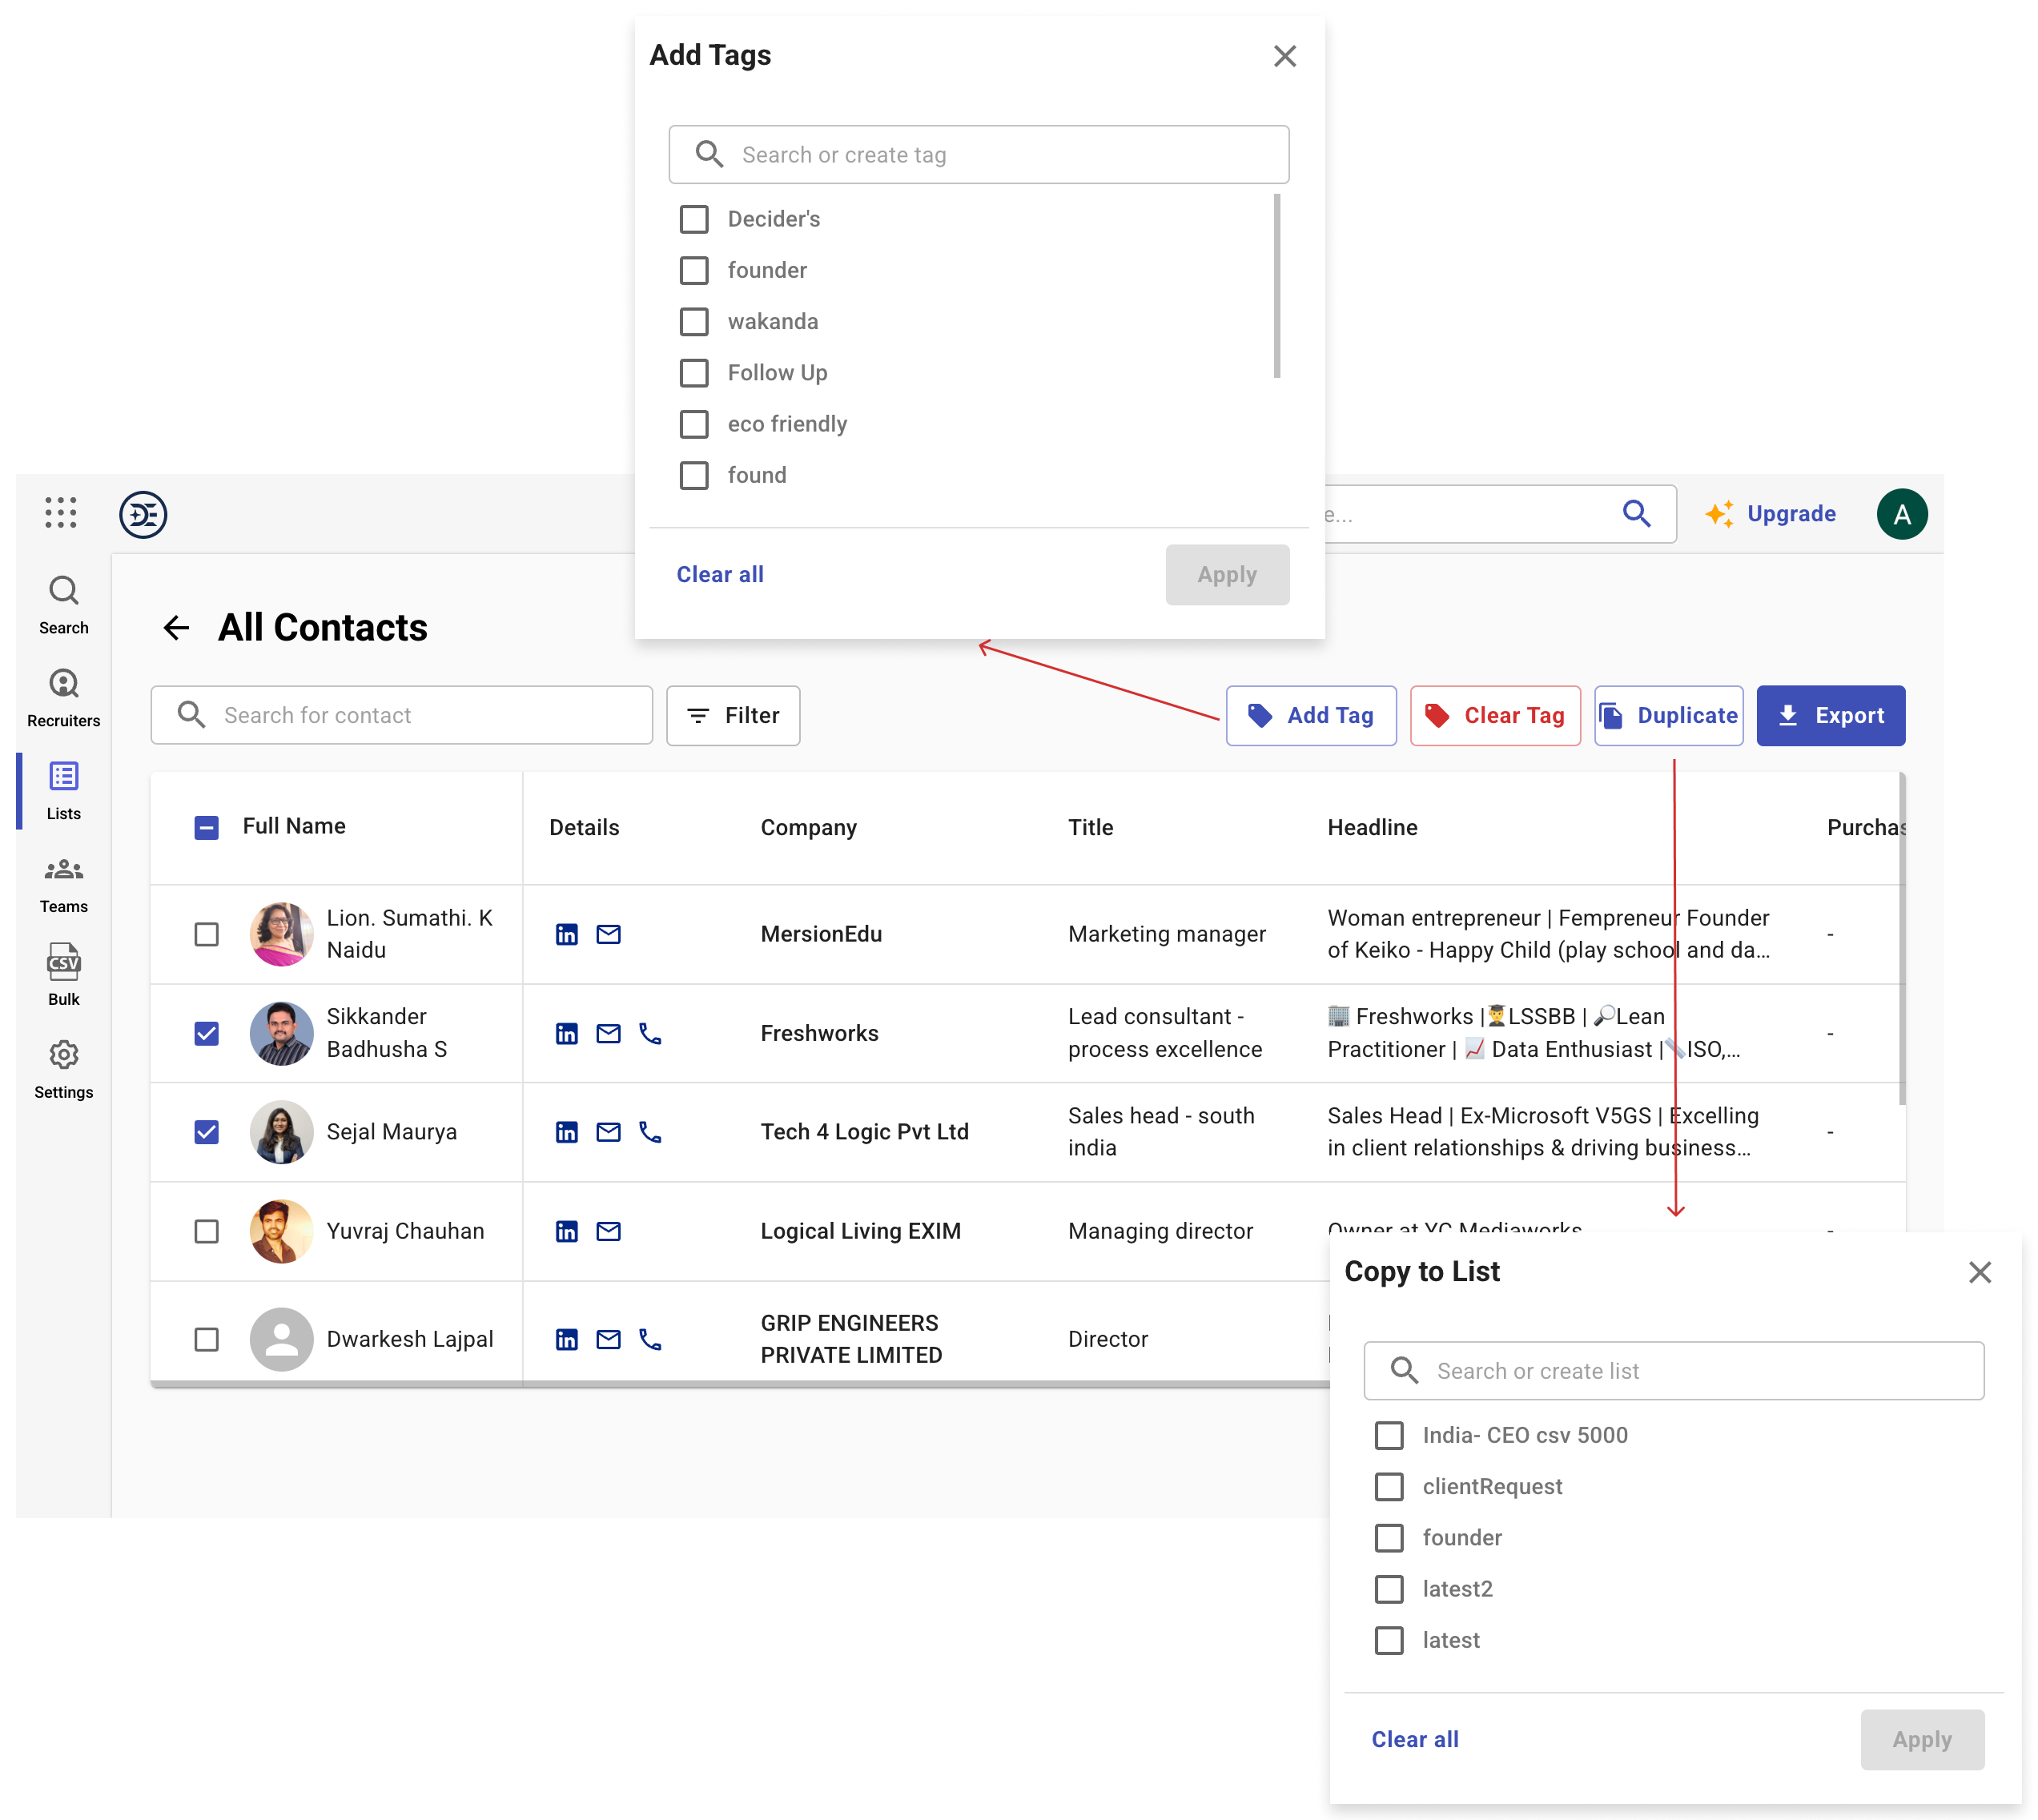
- Adding a Contact to a List
- Overview
- When Is the “Add to List” Option Available?
- How to Add a Contact to a List
- What Happens After Adding a Contact?
- Managing Your Saved Contacts
- How to Create a Campaign
- Open the Campaigns Section
- Give Your Campaign a Name
- Choose a Quick Start Template (Optional)
- Define Your Target Audience
- Configure Lead Delivery
- Choose Notification Preferences
- Email Notifications
- Webhook Notifications
- Webhook
- Review the Live Estimate
- Complete the Launch Checklist
- Launch Your Campaign
- Invite a Manager or Agent to Your Plan
- How to Invite
- Invite Email
- Manage Invites
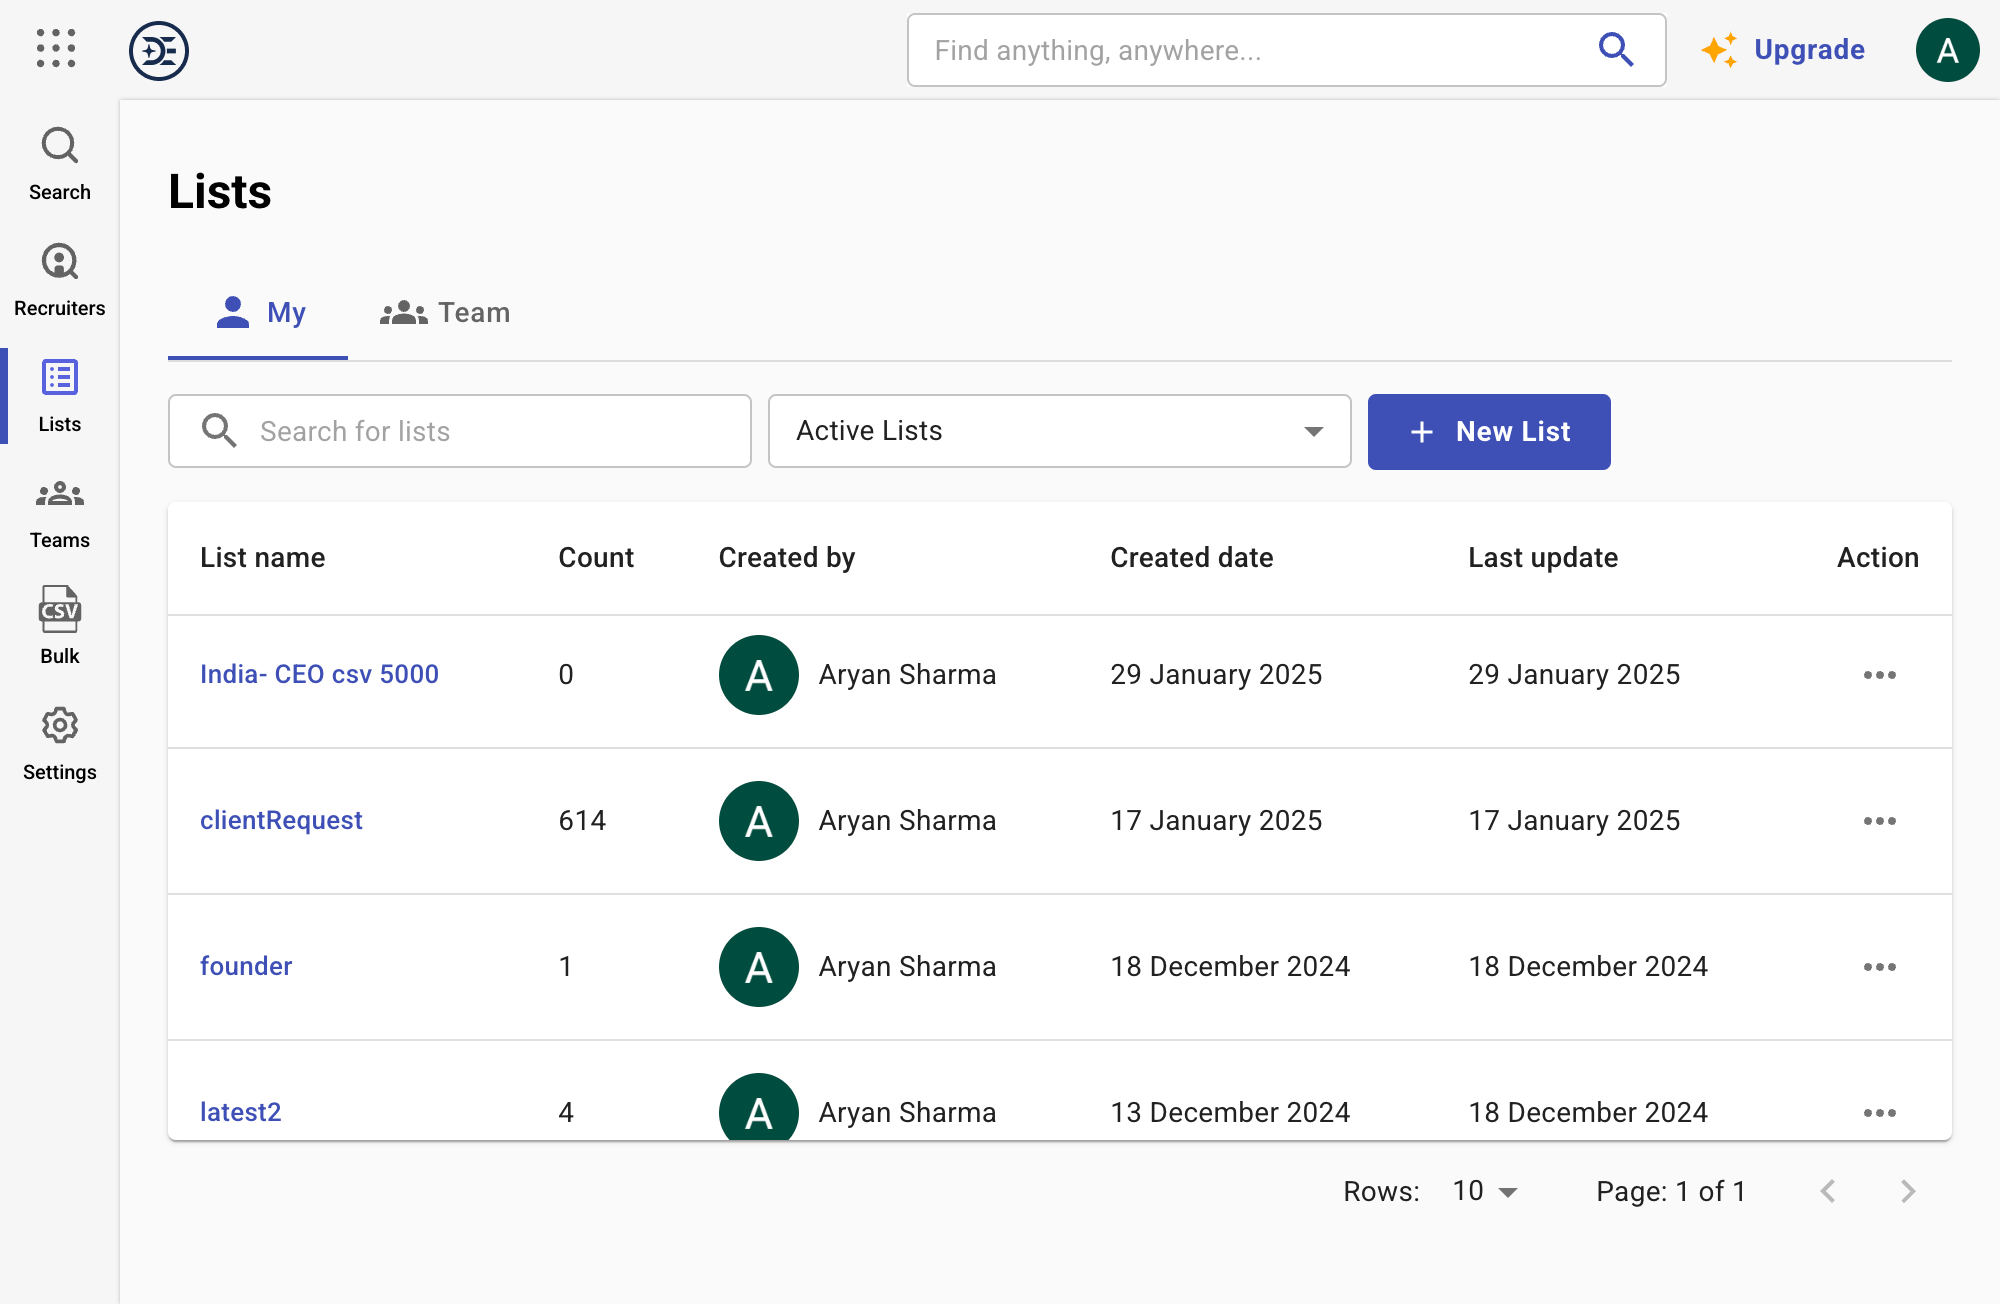
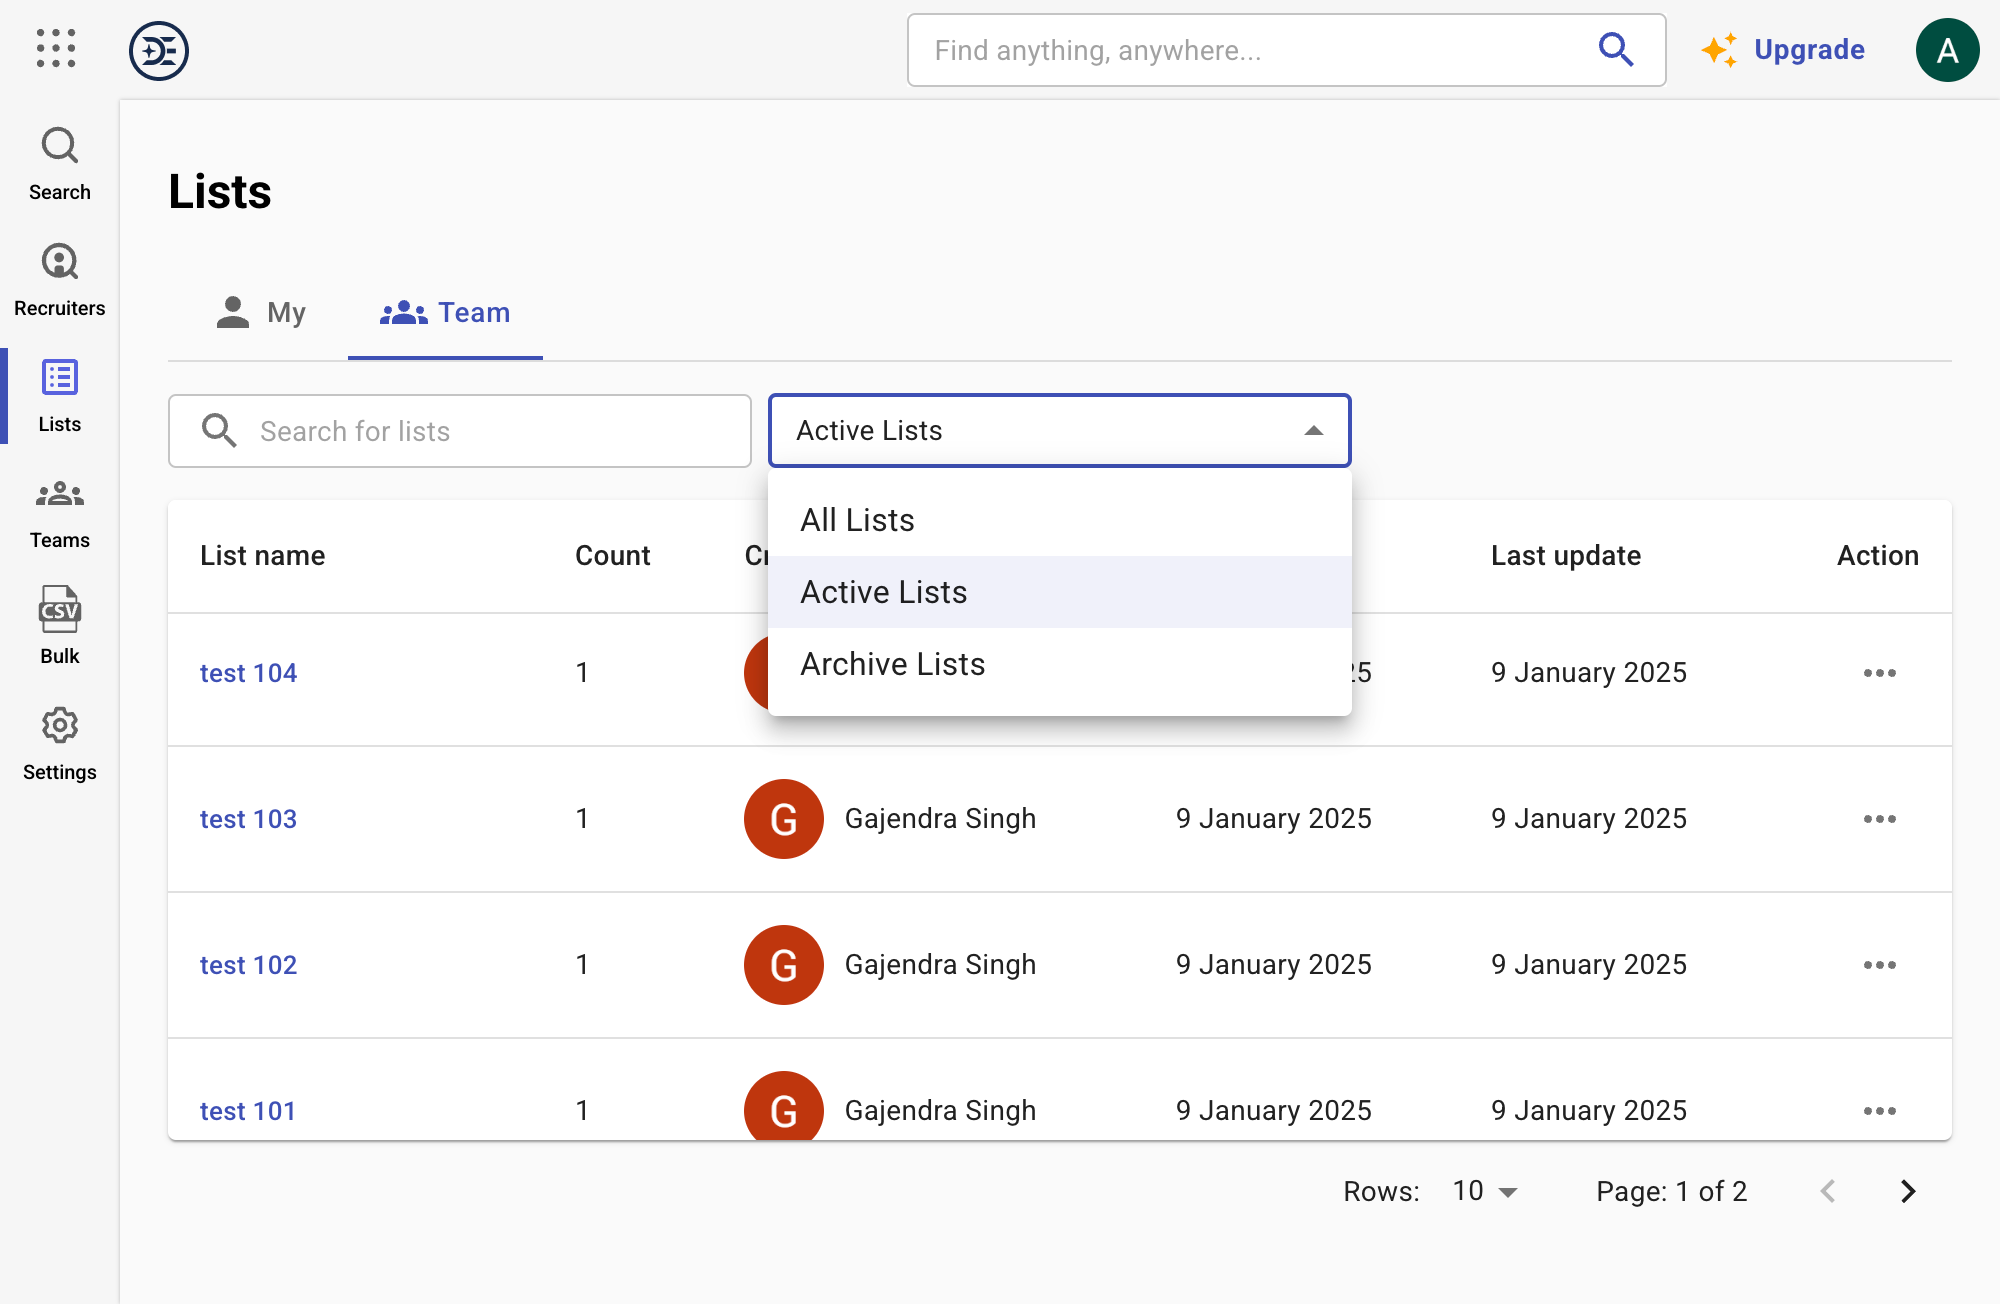
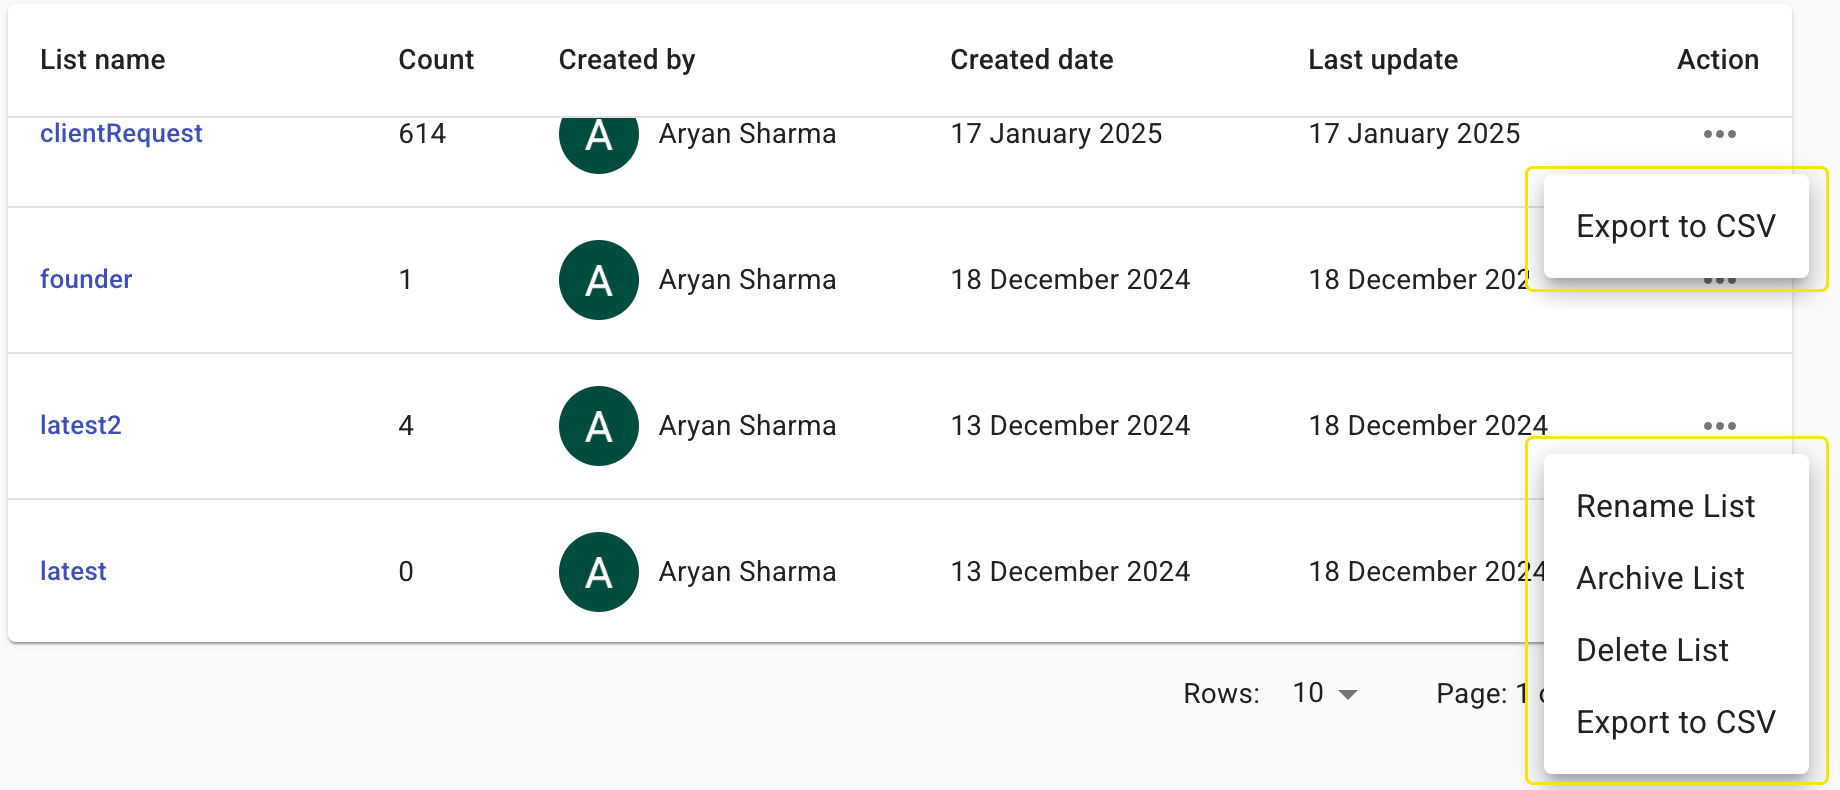
- Lists
- Admin View
- List Features and Options
- Manage List
- My Account
- Payment & Subscription
- How it works
- Upgrade your Plan
- Changing your plan
- Personal Information
- Overview
- My profile
- Reporting Contact
- Overview
- How to Report a Contact
- Completing the Report Form
- Tracking Your Reported Contacts
- Important Notes
- Reporting Contacts
- Sales Panel
- Overview
- How It Works
- Select Data Categories
- Quick Filters (optional)
- Accessing Contact Details and Organizing Your Prospects
- Sales
- Tag Management
- Tag management in Admin Dashboard
- Tag Management in Manager dashboard
- Adding Tags to Contacts
- Search or Create New Tag
- Search contacts by tags
- Team Management
- Upcoming prospects
- How Upcoming Prospects Work
- Dynamic Prospect Pool
- Reviewing Prospects
- Skipping Prospects
- Revealing Contact Details
- Managing Multiple Prospects
- Reporting Prospects
- Profile Types
- Automated Campaign Enrichment